QUICK SUMMARY
This homemade nipple cream is a soothing DIY balm for nursing moms and chafing athletes. It uses calendula-infused oil, cocoa butter, and optional beeswax or shea butter to help moisturize, soften, and protect tender skin.
For breastfeeding moms, nipple pain is often connected to latch, tissue trauma, tongue tie, mastitis, clogged or narrowed ducts, or simple early-postpartum sensitivity. A good nipple cream can be a wonderful comfort tool, but if pain is severe, persistent, or paired with cracking, bleeding, fever, or flu-like symptoms, get hands-on help from a lactation consultant or trusted provider.
For athletes, this balm helps reduce friction in high-rub areas like nipples, thighs, underarms, groin, and feet. It is a simple non-toxic swap for families who want to avoid synthetic fragrance, dyes, parabens, and petroleum-based body care ingredients.
This homemade nipple cream is great for nursing moms and chafing athletes.
Breastfeeding, while challenging at times, is very rewarding. The more flexible and nourished your skin is, the less likely you are to deal with painful cracks, chapping, and the “razor blade” feeling many new moms know all too well. My Homemade Nipple Cream with Essential Oils can help support healthy skin tissue while creating a comforting barrier between feedings. Because your baby may come in contact with anything you put on your nipples, you want to be super careful and use only the best ingredients. This nipple cream fits the bill perfectly! You can even make this cream fully organic. I know this recipe is going to be one of your favorite mom hacks.
Chafing in athletes is caused by repetitive friction—typically skin rubbing against skin, clothing, or equipment. This irritation can lead to redness, discomfort, burning, or even painful raw skin. The problem many athletes face is that conventional anti-chafing balms may include synthetic fragrance, dyes, petroleum-based ingredients, or preservatives that are not ideal for sensitive skin. This DIY nipple cream makes a gentle, effective natural alternative when you want a plant-based balm that helps protect the skin without adding to your toxic burden.
Table of Contents
What Causes Breastfeeding Pain?
Breastfeeding is such a wonderful bonding experience. For a select few, nursing is smooth sailing, but most breastfeeding mothers will attest to their share of challenges. The main challenge that nursing mothers face is breastfeeding pain.
This happens for a variety of reasons, including the following.
- Poor latch
- Mastitis
- Clogged or narrowed milk ducts
- Nipple sensitivity
- Tongue ties
- Pumping flange issues
- Dry, cracked, or irritated skin
As a lactation consultant, I’ve seen many women frustrated because of nursing struggles. By far, nipple sensitivity is one of the most common complaints! Before you throw in the towel, I recommend trying this nipple cream DIY.
Here’s the thing: nipple pain is your body asking for support. Current lactation research continues to point to repeated mechanical stress, latch issues, and tissue trauma as major drivers of breastfeeding-related nipple pain and damage. (1) A 2025 meta-analysis also found that targeted, specialized interventions for nipple pain and injury are more effective than general advice alone, and prevention before pain begins works better than waiting until the damage is already done. (2)
So what does that mean for you? Use this cream for comfort and skin nourishment, and also make sure the root cause is addressed. Check baby’s latch, feeding position, tongue movement, and your pump flange size if you’re pumping. If pain is intense, one-sided, worsening, or accompanied by fever, chills, redness, or flu-like symptoms, get help quickly.
Application: Keep this nipple cream in your nursing basket and apply a thin layer after feedings. For visible product left on the nipple or areola before the next feeding, gently wipe it away. This keeps things simple, safe, and practical while still giving your skin the support it needs. (9)
I can honestly say that no other nipple cream has provided me with such relief! It nourishes from the inside out and protects against future irritations.
What Causes Chafing in Athletes?
Chafing in athletes is caused by repeated friction, often from skin rubbing against skin or clothing during physical activity. It’s worsened by moisture from sweat, ill-fitting or rough clothing, heat, and prolonged movement. Common areas affected include the thighs, underarms, groin, nipples, and feet. Factors like humidity, long workouts, seams, straps, and sweat-soaked clothing increase the risk. (3)
To prevent chafing, athletes should wear moisture-wicking, properly fitted clothing, keep the skin dry whenever possible, and use anti-chafing balms or powders. But be careful. Many commercial anti-chafing balms rely on ingredients that may not fit your family’s non-toxic living goals, especially if you’re applying them to sensitive areas again and again.
Common ingredients to watch for:
- Petroleum jelly (petrolatum): Often used as a barrier; it can reduce friction, but it is petroleum-derived and not our favorite option for families trying to use plant-based body care.
- Silicones (like dimethicone): Create a smooth barrier, but many natural living families prefer simpler, plant-based ingredients.
- Preservatives (like parabens): Used to extend shelf life, but research continues to examine paraben exposure and endocrine-related pathways. (5)
- Synthetic fragrances: Can trigger allergic reactions or contact dermatitis in sensitive people, and fragrance is one of the best-known cosmetic allergen categories. (4)
- Colorants and dyes: Unnecessary additives that may irritate sensitive areas.
Bottom line, if you want to heal and not hurt your nipples or body in the process, avoid unnecessary chemicals!
Application: Athletes can apply a thin layer of this balm before a long run, bike ride, hike, or workout. Focus on high-friction areas. After activity, cleanse gently, dry the skin, and reapply if needed.
Safe Ingredients for Nipple Cream
The best thing about this nipple cream is that you can make it with simple ingredients you recognize. That matters for nursing moms, athletes, and anyone trying to steward their body well and reduce toxic burden at home. Here’s what you need.
Calendula-infused Oil: This is an ingredient you make yourself. Don’t worry; this is a simple DIY. You can even put it in the crockpot!
This infused oil uses a flower that comes from the marigold family. Calendula has been used for years to treat skin issues and support irritated skin. Research reviews continue to highlight calendula’s traditional and studied use for soothing inflamed and damaged skin and supporting wound-healing pathways. (6) It comes in handy when you’re dealing with nipple inflammation or friction-related irritation.
Cocoa Butter: Cocoa butter is rich, soothing, and full of skin-loving fatty acids. I love cocoa butter because it creates a protective layer and helps seal in moisture. Newer topical cocoa research also shows that cocoa-derived polyphenols can be delivered to the outer layer of skin, giving us one more reason to appreciate this God-given plant ingredient in body care. (7)
Beeswax or Shea Butter: If you want a thicker formula with more staying power, use one of these ingredients! Both are incredibly moisturizing on the skin. Beeswax helps form a protective barrier on the skin surface, and a 2023 skincare review found beeswax to be a useful natural ingredient in topical products. (8)
If you’re looking for a vegan alternative to beeswax, try using shea butter. Shea is a natural emollient, and it helps seal in moisture.
Essential Oils: I love using calming essential oils like lavender and Roman chamomile in this recipe. The key is using them wisely: only a few drops, always diluted, and applied between feedings rather than right before baby latches. Current breastfeeding references recommend applying nipple products sparingly after feeds and wiping away visible residue before the next breastfeeding session. (9)
Essential Oils & Homemade Nipple Cream
Did you know that you can customize this nipple cream by swapping the essential oils? Essential oils can help with specific breastfeeding or chafing issues depending on the blend of oils you use.
When adding essential oils, the key is to use the cream between feedings. I usually apply this cream right after breastfeeding, building in time before the next nursing session. If there is any visible residue when it’s time for baby to nurse again, gently wipe it off first.
Reality check: essential oils are powerful. More is not better, especially when nursing. Use the amount in the recipe, don’t apply essential oils neat to the nipple, and avoid letting baby ingest them. LactMed notes that lavender has no specific lactation-related use and advises avoiding topical lavender oil around the breast; tea tree oil should also be avoided around the breast unless thoroughly removed before nursing. (10, 12) Chamomile has traditional use for cracked nipples, but it can cause contact dermatitis in sensitive people, especially those who react to plants in the aster family. (11)
That doesn’t mean you can’t use oils wisely. It means you respect them.
My favorite EOs to use in this recipe include:
- Clary sage – Use Clary Sage oil in the late-pregnancy season only as directed by your birth team. I start using this oil at 36-38 weeks pregnant and stop this mixture after birth.
- Chamomile, lavender, geranium & tea tree – This is a comforting, soothing blend traditionally used when the skin needs extra care. If you include tea tree while breastfeeding, apply between feeds and remove any residue before nursing.
- Fennel, basil, & lavender – This blend has been traditionally used by nursing moms for milk production support, but low supply should always be evaluated for latch, feeding frequency, baby transfer, hydration, nutrition, and postpartum recovery.
- Sage – This blend is excellent for decreasing milk production. A great oil to use during the weaning season.
- Lavender, tea tree, patchouli, orange – If you struggle with mastitis symptoms, this blend can be part of a comforting topical routine, but mastitis can progress quickly. Get lactation and medical support if you have fever, chills, red streaking, worsening pain, or flu-like symptoms.
Application: For the recipe card below, lavender and/or Roman chamomile are the gentlest choices. For athletes who are not nursing, you have more flexibility with oils, but dilution still matters.
Make Calendula-Infused Oil

This recipe comes together in just a few simple steps. The first part is to make the infused oil!

Calendula-Infused Oil
Quantity
Ingredients
- 1 cup extra-virgin olive oil
- ½ cup dried calendula flowers
- ½ cup dried chamomile flowers (optional)
Supplies
- Double boiler OR glass jar OR measuring cup
Instructions
- Use a double boiler, or make one by setting a glass jar or measuring cup in a medium pot with 1-2 inches of water. Bring the water to boiling then turn down to med/med-high.
- Make the infused oil by putting the olive oil and flowers into a double boiler and heating it low for several hours. The oil should slightly change color and take on the smell of the herbs.
- CROCKPOT METHOD – If you don’t have a double boiler, you can use a crockpot on low heat to allow the oil to infuse. I usually use a wide-mouth, pint-sized jar and put in enough hot water to come more than halfway up the side of the jar. Let it sit for about 4 hours.
- Once the oil is fully infused, strain the flower pieces using a jelly strainer held over a glass measuring cup. Squeeze out all the infused oil, and reserve that precious oil for the nipple cream recipe.
Step One: Boil the Water

Fill a saucepan with 1-2 inches of water and place over high heat. Bring to a boil, then turn down to medium-high.
Step Two: Infuse the Oil

Put the olive oil, calendula flowers, and chamomile flowers (if using) into a double boiler or glass jar. Place in the saucepan and let simmer on low for several hours.
When done, the oil will change colors and take on the smell of the herbs.
Step Three: Strain the Oil

Once the oil is fully infused, strain the flower pieces using a jelly strainer held over a glass measuring cup.
Squeeze the flowers to get out all the infused oil. Save that luscious oil for your nipple cream!
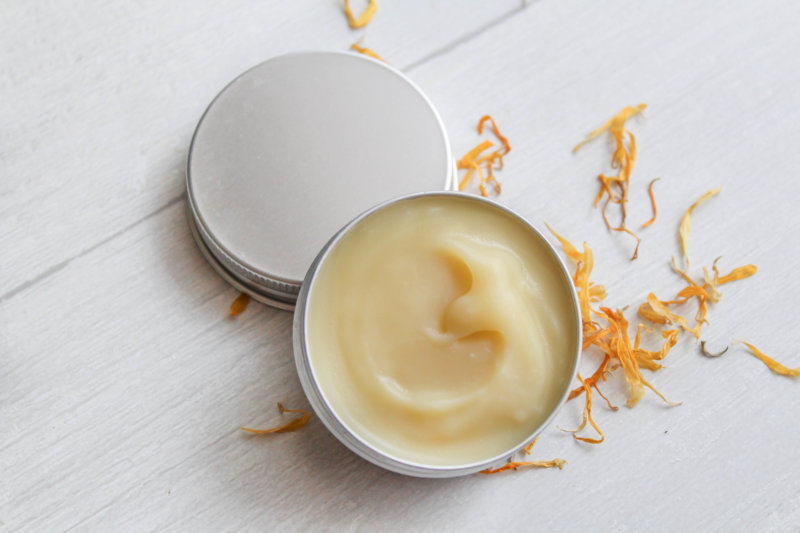
Make Homemade Nipple Cream
This nipple cream makes a lovely gift for a new Mama or a fantastic staple for your nursing basket! Here’s how to make it.
Homemade Nipple Cream with Essential Oils for Breastfeeding Moms
Quantity
Ingredients
- ½ cup calendula-infused oil
- ½ cup organic cocoa butter
- 2 ounces organic beeswax pellets, yellow or white OR unrefined shea butter (optional)*
- 8 drops essential oils**
Supplies
- Double boiler or glass jar set in a saucepan
Instructions
- In a double boiler or glass jar set in a saucepan filled with 1-2 inches of water, melt the infused oil and cocoa butter together. If using, melt the beeswax also.
- When melted, remove from heat and add essential oil.
- Store the cream in a sterilized glass jar. If it is not exposed to sunlight, it should last for up to 6 months.
- Apply a thin layer to your dry nipples and areola between feedings.
- Cool the cream in your refrigerator before applying it for even more soothing benefits.
Step One: Melt the Moisturizers

Fill a saucepan with 1-2 inches of water and place over medium-high heat.
Place the calendula-infused oil, cocoa butter, and beeswax (if using) in a double-boiler or glass jar. Set in the saucepan and heat until melted.
Step Two: Add Essential Oils

Remove from heat and add essential oils. Store in a sterilized salve container or glass jar.
If not sitting in sunlight, it should last up to 6 months.
To use, apply a thin layer to your dry nipples and areola between feedings. Cool the cream in your refrigerator before using it for even more soothing benefits.
Mama Z Pro Tips:
For a soft balm, mix equal parts infused oil with cocoa butter. If it’s too hard for your liking, add more of the calendula-infused oil to your mixture.
You can make a harder balm by adding more cocoa butter or, if your baby is a bit older, unbleached beeswax. Try half the amount of oil you started with for the beeswax and adjust from there to your liking.
This is the perfect cream to use during what I call the “razor blade” days of breastfeeding – about the first two weeks postpartum. I apply after every feeding to help ease the transition.
Once that initial pain lessens, you’ll be able to nurse indefinitely.
If you have cracked or bleeding nipples, try the chamomile washcloth trick from the recipe card notes: steep 6-8 organic chamomile tea bags in hot purified or distilled water, let the liquid cool until bearable, dip dark-colored washcloths in the tea, and lay them over the breasts before nursing. Follow the nursing session with this nipple cream. If the skin reacts or becomes itchier, stop using chamomile.
Homemade Nipple Cream FAQs
Do I need to wash homemade nipple cream off before nursing?
Apply nipple cream sparingly after feedings. If any visible product remains on the nipple or areola before the next feed, gently wipe it off before baby latches. This is especially important when essential oils are included. (9)
Can I use this nipple cream without essential oils?
Absolutely. For brand-new babies, very sensitive moms, or anyone who wants the simplest option, make the balm with calendula-infused oil, cocoa butter, and optional beeswax or shea butter only. It will still be wonderfully moisturizing and soothing.
What essential oils are best for homemade nipple cream?
Lavender and Roman chamomile are Mama Z’s favorite gentle options for this recipe, but keep the dilution low and apply between feedings. If you are prone to allergies, patch test first. Chamomile can cause contact dermatitis in sensitive individuals, and lavender and tea tree should not be left on the breast for baby to ingest. (10, 11, 12)
Can athletes use this cream for chafing?
Yes! This recipe is a great natural anti-chafing balm. Apply a thin layer to areas that rub before a workout or long event. It works especially well for nipples, thighs, underarms, and other friction-prone spots.
How long does homemade nipple cream last?
If stored in a sterilized glass jar away from sunlight, it should last up to 6 months. If the smell, color, or texture changes, make a fresh batch.
When should breastfeeding pain be checked by a professional?
Get help if pain is severe, persistent, one-sided, or getting worse; if you see cracks, bleeding, blisters, or signs of infection; if you have fever or flu-like symptoms; or if baby is not gaining weight well. A balm can soothe skin, but latch, oral function, milk transfer, and inflammation need the right support too.


- Re-thinking lactation-related nipple pain and damage
- Interventions for breastfeeding-related nipple pain or injury: a meta-analysis
- Cleveland Clinic: Chafing Causes, Treatment & Prevention
- FDA: Allergens in Cosmetics
- Parabens Exposure and Breast Cancer
- An Updated Review on the Multifaceted Therapeutic Potential of Calendula officinalis
- Topical Antioxidant Cocoa Polyphenol Skin Penetration
- A review of the use of beeswax in skincare
- The Breastfeeding Network: Creams and Ointments Applied to the Skin and Breastfeeding
- LactMed: Lavender
- LactMed: Chamomile
- LactMed: Tea Tree Oil